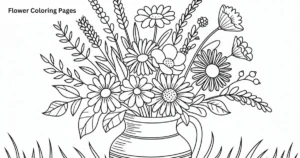
Drawing a peony may seem difficult at first, but with the right steps, anyone can create a beautiful and realistic flower. Whether you’re a beginner or an experienced artist, following a few simple techniques can help you capture the elegance of a peony.
In this guide, we’ll break down the process into easy steps, from sketching the basic outline to adding fine details and shading. With a little patience and practice, you’ll be able to draw a stunning peony that looks lifelike and vibrant.
Materials You’ll Need
Before you start drawing, gather the materials you need. You will need a pencil, eraser, paper, and colored pencils or markers for coloring. Make sure you have a clean, smooth sheet of paper to work on. This will help your drawing look neat and detailed.
Having a sharp pencil is important for fine details. A thicker pencil will help with the initial outline, and a finer pencil will help add delicate details later. Choose your coloring tools according to the look you want to achieve.
Sketch the Basic Outline
Start by drawing a simple circle in the center of your paper. This will be the base of your peony. Around this circle, sketch some light guidelines to form the shape of the petals. Don’t worry about making it perfect—this is just a basic framework.
Next, begin adding a few overlapping petals around the center circle. Make them slightly curved and natural. Keep them light so that you can erase any unnecessary lines later.
Read More: Can Peonies Grow in Pots?
Draw the First Layer of Petals
The first layer of petals should be larger and more open than the rest. These petals will make the peony look full and blooming. Start with a petal shape that looks like an elongated oval with a slightly pointed tip.
Add more petals around the center, making sure they overlap and have different shapes. Some should curve outwards, while others should fold in. This adds depth and makes the flower look more realistic.
Add the Inner Layer of Petals
Now, draw a second layer of smaller petals inside the first layer. These should be narrower and more tightly closed. Position them between the larger petals for balance. Ensure that the inner petals are less prominent, so they don’t overpower the outer ones.
Try to make the inner petals a little more pointed. These will give your peony a more delicate, intricate look. Keep refining the shape as you go along.
Detail the Petals
Once you have the basic shape of the flower, it’s time to add more detail. Begin by drawing thin, curved lines on each petal to represent veins. These veins should run from the base to the tip of each petal, adding texture and realism.
Don’t overdo the lines—keep them soft and subtle. You want the lines to complement the petal shapes, not dominate them. These details will make your peony look more three-dimensional.
Draw the Stem and Leaves
Next, draw the stem of the peony. Start with a straight line coming from the bottom of the flower. Add slight curves to make the stem appear more natural. At the base of the stem, draw two large, oval leaves.
The leaves should be wide at the base and taper to a point. Add small veins in the leaves to show texture. Be sure to make the leaves look balanced and symmetrical to complement the flower.
Add Shading for Depth
Now it’s time to add some shading to bring your peony to life. Shade the underside of the petals and leaves. This will create a sense of light and shadow, making the flower look more three-dimensional.
Use light, smooth strokes for the shading, gradually building it up. The shading should be more intense at the base of the petals, where they curve inward, and lighter as it moves toward the tips.
Color Your Peony
Once your sketch is complete, you can begin coloring your peony. Peonies come in various colors, so you can choose whatever shades you like. Use soft pinks, whites, or even red and yellow to give your flower vibrant life.
Start by filling in the larger areas with light color, then layer darker tones where the shadows fall. Blend the colors gently to create a smooth transition. Finally, color the leaves in shades of green to complement the flower.
Conclusion
In conclusion, drawing a peony is a rewarding creative process that combines simple techniques with attention to detail. By following these steps, you can create a beautiful, realistic peony, whether you’re a beginner or an experienced artist.
Remember, practice is key to improving your skills. With patience and a steady hand, you’ll be able to master the art of drawing peonies and enjoy expressing your creativity through this elegant flower. Keep experimenting with different styles and colors to make your art truly unique.
FAQs
What is the easiest way to draw a peony?
Start with a simple circle for the center and gradually add overlapping petals.
Do I need to use colors when drawing a peony?
No, you can leave it in black and white, but coloring adds vibrancy.
How do I make my peony drawing look more realistic?
Add shading and fine details, like veins on the petals and leaves.
Can I draw a peony without a reference image?
Yes, but using a reference image can help with accuracy.
How long does it take to draw a peony?
It depends on your skill level, but it usually takes 1-2 hours.


